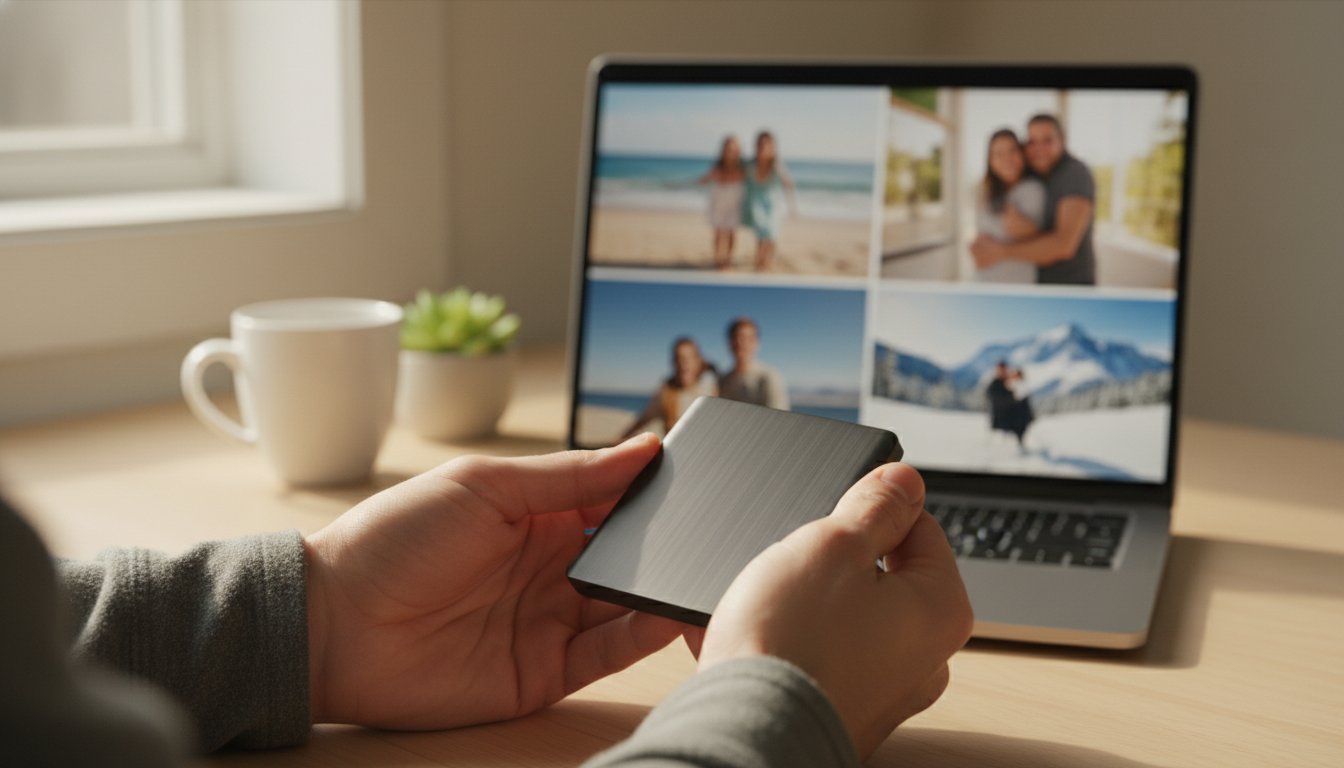
Last week, a friend named Margaret discovered that she couldn't find her wedding anniversary photos among the hundreds of files on her laptop. It's a common feeling to worry that a single wrong click might delete those precious memories forever. Learning how to back up photos from computer to external hard drive doesn't have to be a stressful or confusing task. You likely feel that your photos are your most valuable digital possessions. Keeping them on a physical device you can hold in your hand and keep in a safe drawer provides a special kind of peace of mind.
It's completely normal to feel a bit overwhelmed by technical terms when you just want to keep your memories safe. This guide will show you the simple, step-by-step way to protect your digital legacy on a physical hard drive with total confidence. We will walk through exactly where your photos live, how to move them safely, and how to verify that your backup actually worked. Since the cost of new drives has risen lately, we'll help you make the most of the hardware you already own. By the end, you'll have a clear and repeatable process that you can use whenever you have new memories to save.
Key Takeaways
- Understand that a backup is simply a second copy of your files kept in a safe place separate from your computer.
- Learn how to identify the correct ports on your machine and connect your external drive with care.
- Follow a clear and repeatable process for how to back up photos from computer to external hard drive on both Windows and Mac systems.
- Gain confidence by learning how to look inside your external drive to confirm that your precious memories are stored safely.
- Master the important "Eject" rule to ensure your drive remains healthy and your data stays protected.
Why Backing Up Your Precious Photos is Essential
Your photos are more than just files on a screen. They are your family history, your travel stories, and your favorite memories. A backup is simply a second copy of these files stored in a safe place. If you only keep your pictures on your computer, you are taking a significant risk. Computers are machines, and sometimes machines stop working without any warning. Understanding Backup and Restore concepts helps you realize that having only one copy of a photo is like having only one copy of a birth certificate. If it gets lost or damaged, it is gone forever.
Learning how to back up photos from computer to external hard drive gives you total control over your digital life. You don't have to worry about a "cloud" service changing its rules or losing your password. You also won't have to pay a monthly fee just to look at your own pictures. This process is about making sure your legacy stays safe for your children and grandchildren. It is a simple act of protection that anyone can learn with a little patience.
What is an External Hard Drive?
Think of an external hard drive as a portable digital filing cabinet for your computer. It is a small, lightweight box that plugs into your machine to hold your files. An external hard drive is a physical storage device that connects to your computer to keep copies of your data safe. These devices come in different sizes, which can sometimes be confusing. Some hold a few thousand photos, while others can hold millions. Most people find that a standard 1TB or 2TB drive provides plenty of space for a lifetime of family pictures and home videos.
The Peace of Mind of a Physical Backup
There is a special comfort in holding your backup in your hand. You can see it, touch it, and put it in a desk drawer for safekeeping. This physical copy stays offline, which means it is tucked away from the internet and potential hackers. Keeping your photos on a separate drive is a great way to protect them from technical issues. If your computer ever needs virus and malware removal, your backed-up photos will be safe and untouched on their own device. No monthly fees are required compared to subscription-based cloud services.
Many people prefer this method because it's a one-time purchase. You buy the drive, and you own it forever. You don't have to worry about storage costs that go up every year. Once you know how to back up photos from computer to external hard drive, you can update your backup whenever you want. It is a reliable and straightforward way to keep your history secure without relying on a faceless corporation. Taking this step transforms technical frustration into a wonderful sense of accomplishment and security.
Preparing for Your Backup: Physical Setup
Before you can master how to back up photos from computer to external hard drive, you must get the physical equipment ready. Your external drive usually comes with a single cord. One end plugs into the drive, and the other end plugs into your computer. Look for the small, rectangular slots on the sides of your laptop or the front of your desktop tower. These are called USB ports. Take a moment to look at the plug and the port. They only fit one way. If it feels stuck, do not force it. Just flip the plug over and try again. Handling your equipment with a gentle touch ensures that the delicate connections stay healthy for years.
Plugging in the drive is your first big success. It is the foundation for everything else. Sometimes, your computer might not "see" the drive immediately. Don't worry. This does not mean anything is broken. Often, simply unplugging the cord and trying a different USB port solves the problem. Following data backup and security best practices starts with this steady, patient physical setup. If you feel uneasy about these first steps, our team offers friendly data backup and recovery support to guide you through the process in person or over the phone.
Connecting the Drive to Your Computer
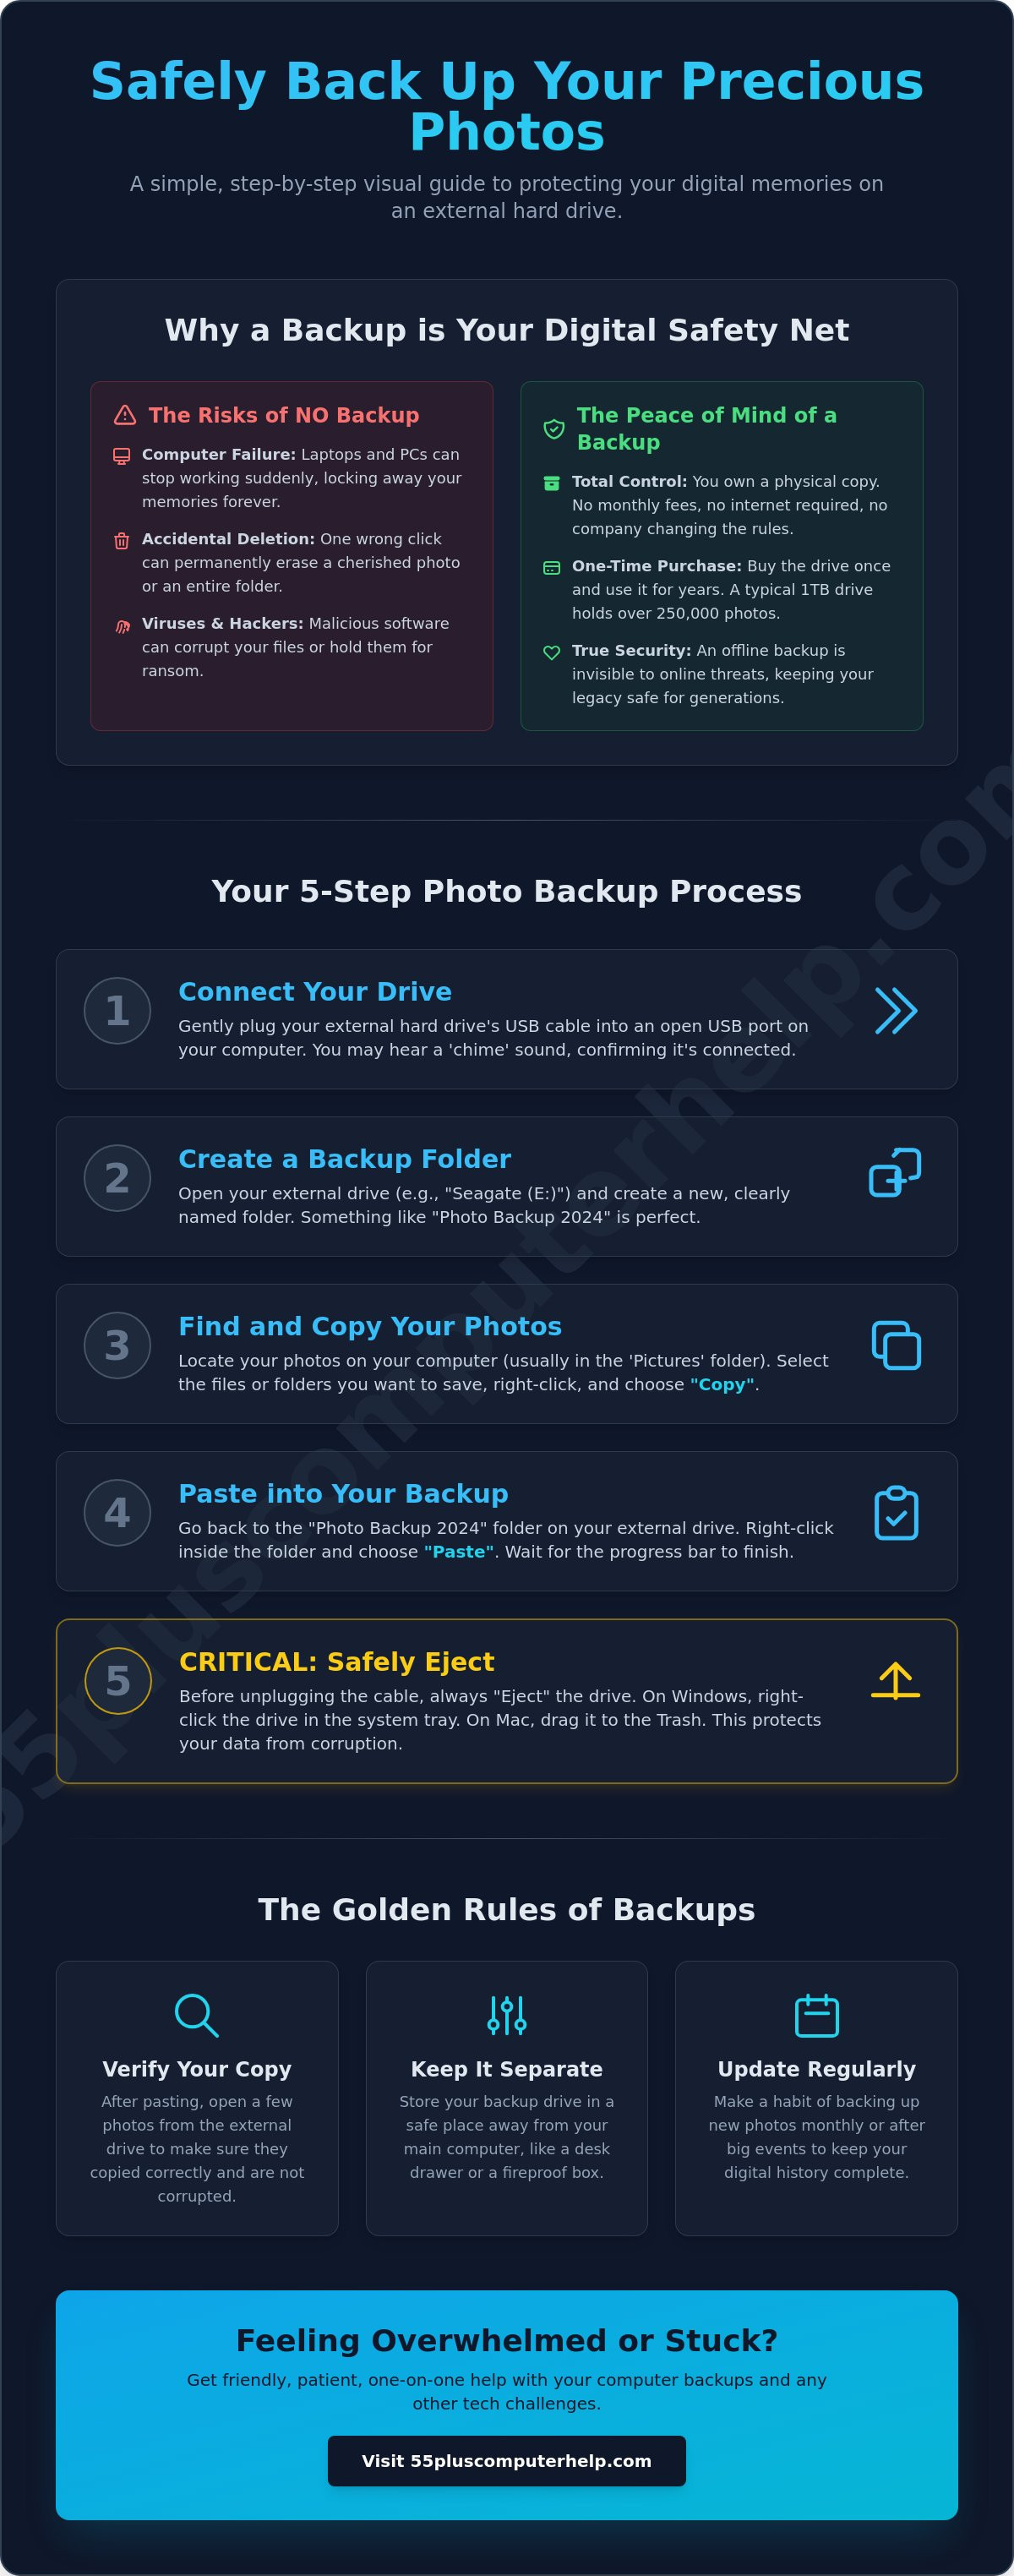
Once you plug the cable in, listen for a soft "chiming" sound from your computer speakers. This is your computer saying hello to the new device. A small notification box may appear in the bottom corner of your screen. It might say "New Drive Detected" or "Removable Disk." Your computer assigns a name to the drive, often a letter like (D:) or (E:). It might also use the brand name of the drive, such as "Samsung" or "Seagate." Knowing this name helps you find the right place to put your pictures later.
Organizing Your Thoughts Before Moving Files
Setting up a clear home for your photos prevents confusion later. We recommend creating one main folder on your new drive and naming it "My Backups 2026." This simple step keeps your current project separate from anything else on the drive. It's also vital to remember that we are "copying" your files, not "moving" them. Copying creates a perfect twin of your photo. The original stays safe on your computer, and the twin goes onto the hard drive. You are not losing anything; you are simply making your memories twice as safe. This mindset is the key to learning how to back up photos from computer to external hard drive with total confidence.
How to Back Up Photos on a Windows PC
Now that your drive is plugged in, let's look at your computer screen. Windows uses a tool called File Explorer to help you find your files. You can find it by looking for the small yellow folder icon at the bottom of your screen. Click it once to open a new window. This window shows everything stored on your computer. It might look busy at first, but don't let the many names and icons worry you. We are only looking for one specific place to start.
On the left-hand side of this window, you will see a list of locations. Look for the word "Pictures." It usually has a small icon of a camera next to it. When you click "Pictures," all your saved memories will appear in the main part of the window. Learning how to back up photos from computer to external hard drive is much easier once you can see all your images in one place. You can select one photo by clicking it once. If you want to select every photo in the folder, look for the "Select all" button at the top of the window and click it. Your photos will turn blue to show they are ready.
The Simple Right-Click Method
Once your photos are highlighted in blue, you are ready to copy them. Use your mouse to right-click on any of the highlighted photos. A menu will pop up near your cursor. Look down the list and click the word "Copy." It might feel like nothing happened, but your computer has now memorized those files. Now, look back at the list on the left side of the window. Find the name of your external drive that we identified earlier. Click it once to open your "My Backups 2026" folder. Right-click on any empty white space inside that folder and select "Paste." You will see your photos start to appear one by one.
Using the "Send To" Shortcut
There is another way to finish this task that many people find even simpler. After you have highlighted your photos in the Pictures folder, right-click on them again. Instead of choosing "Copy," look for the option that says "Send to." When you hover your mouse over that word, a second list will appear. Find the name of your external hard drive in that second list and click it. This is a very reliable way to handle how to back up photos from computer to external hard drive without moving between different windows.
A small box will appear on your screen with a blue progress bar. This bar shows you that the computer is working hard to create those twin copies for you. If you have thousands of photos, this might take a few minutes. This is a perfect time to go grab a cup of tea. When the bar reaches the end and the box disappears, your backup is complete. You have successfully protected your memories with a physical copy.
How to Back Up Photos on a Mac
If you use an Apple computer, the process for saving your memories is very visual and straightforward. You will start by using a tool called "Finder." This is the blue smiling face icon located on the dock at the bottom of your screen. When you click it, a window opens that shows everything on your computer. Your external hard drive should appear on your desktop as a small silver or white icon. You can also find it listed on the left-hand side of the Finder window under a section called "Locations."
Most Mac users keep their pictures inside the "Photos" app, which has a colorful flower icon. It is important to understand that the Photos app is like a digital scrapbook that keeps all your images tucked away in one big bundle. Learning how to back up photos from computer to external hard drive on a Mac requires a slightly different approach than on a PC. You can't always just grab a photo and pull it out without losing some of the quality. We want to make sure your pictures stay as clear and beautiful as the day you took them.
If you find these steps a bit confusing or worry about making a mistake, we are here to help. Our team provides personalized data backup and recovery training to ensure you feel confident every time you save a new memory. We can walk through these steps together at your own pace.
Exporting Directly from the Photos App
To keep your photos in the highest quality, you should use the "Export" command. First, open your Photos app and select the pictures you want to save. You can click one photo, or hold the "Command" key to click several. Next, look at the very top of your screen and click on "File," then hover over "Export." Choose "Export Unmodified Original." A box will appear asking where you want to save them. Look for the name of your external hard drive in the list and click "Export." This ensures the computer sends a perfect twin of your photo to the drive.
Dragging Folders in Finder
If you prefer to move everything at once, you can copy your entire Pictures folder. Open a Finder window and find "Pictures" in the sidebar. Click and hold that folder, then drag it over to your external drive icon. Before you let go of the mouse, hold down the "Option" key on your keyboard. A small green plus sign will appear. This tells the Mac to make a copy rather than moving the original. Once the copy is finished, always click the small "Eject" icon next to your drive's name before you unplug the cable. This little triangle with a line under it keeps your drive healthy and your data safe.
Confirming Your Backup and Staying Safe
You have finished the copying process. Now it is time for the most rewarding part: making sure everything is safe. Open your external drive by double-clicking its icon. You should see your "My Backups 2026" folder right there. When you open that folder, your photos should be waiting for you. This is the final step in learning how to back up photos from computer to external hard drive. It turns a technical task into a true feeling of security. You can look through the files and see your memories resting safely in their new home.
Before you unplug the cable, you must tell the computer you are finished. This is called "Ejecting" the drive. On a Windows PC, look for a tiny arrow near the clock at the bottom right. Click it and find the icon that looks like a small USB plug. Click it and select "Eject." On a Mac, click the small triangle icon next to the drive name in Finder. Never just pull the plug. Doing so can confuse the computer and might damage your files. Waiting for the "Safe to Remove Hardware" message ensures your hard work stays protected.
Once the drive is unplugged, find a permanent home for it. A cool, dry desk drawer or a small fireproof box is a great choice. Avoid keeping it on top of your computer tower where it might get too warm. You now have a physical copy of your life history kept safe away from the internet. Set a reminder on your kitchen calendar to repeat this process every few months. Consistency makes the job faster and easier the next time you have new memories to save.
Verifying Your Backup Was Successful
To be absolutely sure, you can look at the number of items you copied. Right-click your original Pictures folder on your computer and select "Properties" or "Get Info" to see how many files are inside. Do the same for the folder on your external drive. The numbers should match. Open one or two random photos from the drive just to be certain. If you can see the smiling faces of your family, your backup was a success. You can now breathe a sigh of relief knowing your pictures are officially protected.
Next Steps: Sharing and Security
Now that your photos are secure, you might want to consider organizing your digital photos so they are even easier to find and share with friends. Keeping your computer software updated is another great way to prevent future technical glitches. If your computer ever feels slow or stuck during these steps, don't hesitate to ask for professional help. Our team provides patient support for these tasks to keep your digital life running smoothly and safely.
Protecting Your Memories for the Future
You have finished the hard part. By following this guide, you've moved from worry to a state of total protection. You now understand that a steady physical setup is the foundation of a safe backup. You also know the specific steps to copy your files whether you use a PC or a Mac. Mastering how to back up photos from computer to external hard drive is a wonderful way to ensure your digital legacy remains intact for years to come. You've gained the independence to manage your files and the clarity to know they're secure.
If you still feel a bit nervous about the technical steps, you don't have to do it alone. Since 2014, we have helped seniors gain confidence with technology through patient, one-on-one training. We specialize in data backup and recovery and would love to support you. Need a patient hand to help set up your backup system? Contact 55 Plus Computer Help LLC today! You've already taken the biggest step by deciding to protect your memories. Now, you can enjoy the peace of mind that comes with knowing your photos are tucked away safely in your home.
Common Questions About Photo Backups
Is it better to "Copy" or "Move" my photos to the external drive?
You should always choose to "Copy" your photos rather than moving them. Copying creates a perfect twin of your memory while keeping the original file safe on your computer. If you choose "Move," the computer deletes the original file once it finishes the transfer. A true backup means having your photos in two different places at the same time for maximum safety.
Can I use the same external hard drive for both a Mac and a PC?
You can use one drive for both, but it often requires a special setup called ExFAT formatting. Many drives come from the store ready to work specifically with either a Windows PC or a Mac. It is usually much simpler and more reliable to have a dedicated drive for each computer to ensure your files stay easy to find and use.
What happens if I unplug the hard drive while it is still backing up?
Unplugging a drive during a backup can cause your files to become unreadable or "corrupted." It is like pulling a piece of paper out of a typewriter while someone is still typing on it. Always wait for the progress bar to disappear and use the "Eject" rule mentioned earlier in this guide to keep your drive and your memories healthy.
How much space do I need on a hard drive for 1,000 photos?
You only need about 5 to 10 Gigabytes of space for 1,000 standard photos. Most modern external drives hold 1,000 Gigabytes or more. This means you will have plenty of room for your entire family history. You won't have to worry about running out of space for a very long time.
Do I need an internet connection to back up to an external hard drive?
No, you do not need any internet connection to complete this task. This is one of the best parts of learning how to back up photos from computer to external hard drive. Your memories stay private and safe on your physical device even if your Wi-Fi is not working or the power is out.
Will my photos stay on the computer after I back them up?
Yes, your photos will stay exactly where they are in your "Pictures" folder. When you copy them to a drive, you aren't taking them off your computer. You are simply creating a safety net. If your computer ever stops working, you will still have that second copy tucked away safely in a drawer.
How long do external hard drives usually last?
Most external hard drives last between 3 and 5 years with regular use. They are very reliable, but they are still machines that can wear out over time. It is a smart habit to buy a new drive every few years and copy your old photos onto the new one to keep your digital library fresh.
What is the difference between a "Flash Drive" and an "External Hard Drive"?
A flash drive is a tiny stick meant for moving a few files quickly, like taking a document to a library to print. An external hard drive is a sturdier, larger device built for long-term storage and protection. When you want to know how to back up photos from computer to external hard drive properly, the larger drive is the more reliable choice for your lifetime of memories.


